> For the complete documentation index, see [llms.txt](https://docs.glbnxt.com/llms.txt). Markdown versions of documentation pages are available by appending `.md` to page URLs; this page is available as [Markdown](https://docs.glbnxt.com/tutorials/guides/openwebui/mcp-openwebui.md).
# Connecting an MCP Server to OpenWebUI
### Introduction
By linking an MCP server, you give your models the power to execute custom functions, tap into external APIs, and bridge data gaps in real time. Whether you need an assistant that can query documentation databases, run custom scripts, or interact with web endpoints, this integration turns OpenWebUI into a highly customized, production-grade AI workstation.
The **Model Context Protocol (MCP)** is an open standard that creates a universal bridge between Large Language Models (LLMs) and external data sources.
Traditionally, if you wanted an AI to read your local files, query a database, or check your calendar, you had to build a custom, one-off integration for every specific app. MCP replaces this complexity with a standardized architecture. Instead of teaching the AI how to use a hundred different apps, you simply connect it to an MCP server that speaks a language the AI already understands.
This guide provides a straightforward, step-by-step walkthrough to help you register an HTTP-based MCP server in your OpenWebUI admin console and successfully deploy its tools to your active models in the chat interface.
***
### Prerequisites
* **Admin rights:** Make sure you have access to OpenWebUI with admin or tool management permissions.
* **Open OpenWebUI:** Open the application from your **Dashboard**.
* **MCP server:** Have your own MCP server.
***
### Steps
#### Step 1: Start MCP setup
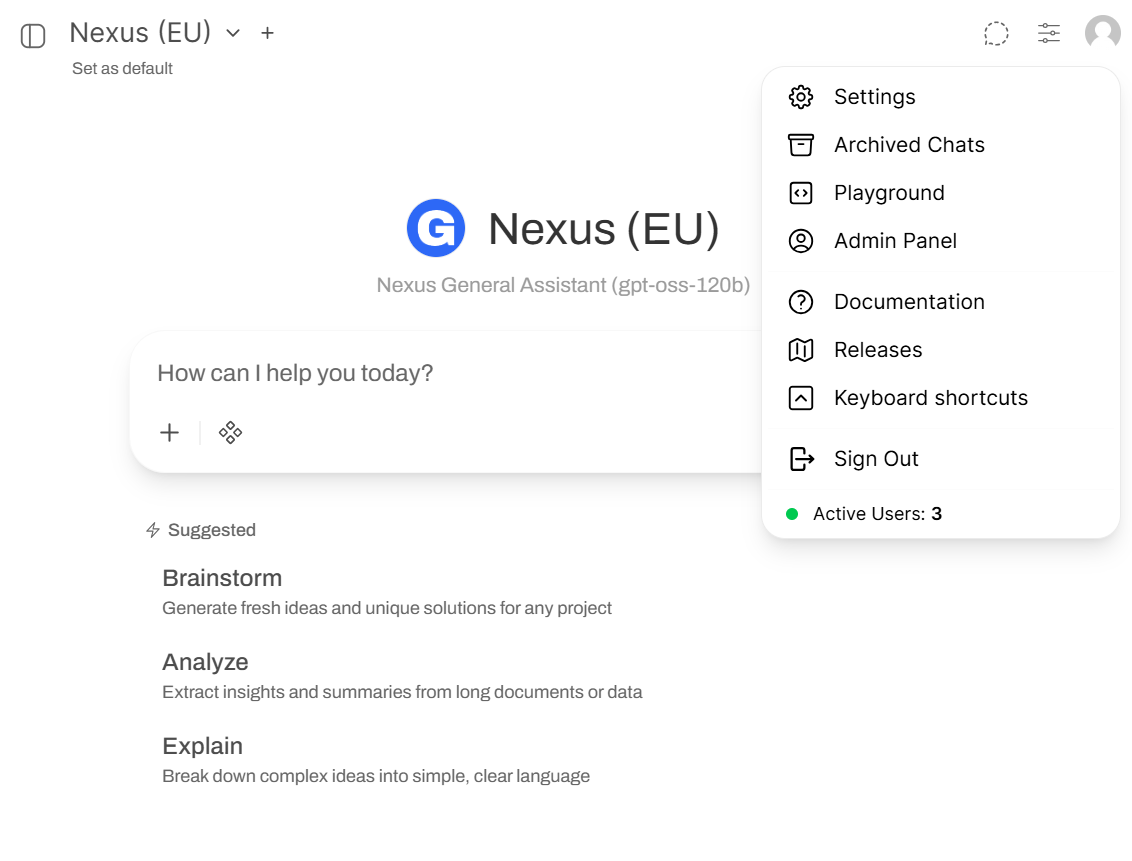
1. In your OpenWebUI application, click on your **User Icon**.
2. Select **Admin Panel** and go to **Settings**.
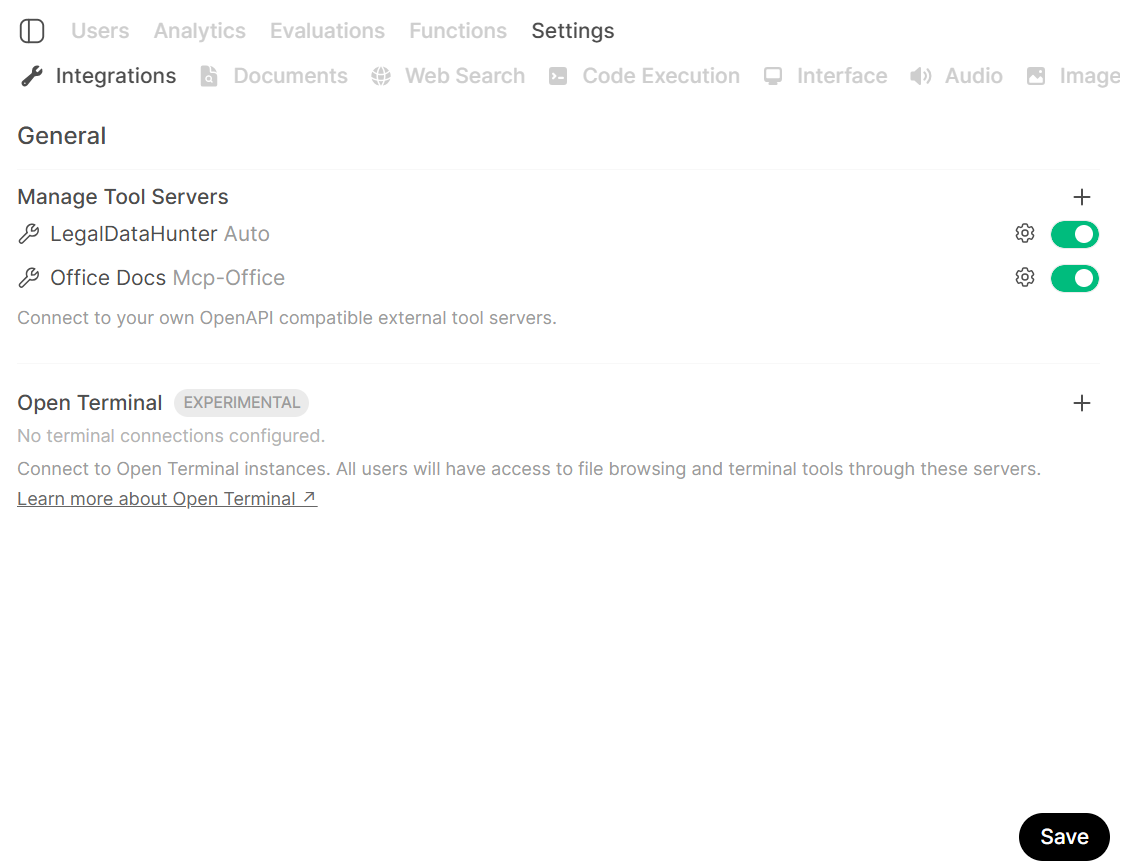
 3. Go to **Integrations**, here you will find **Manage Tool Servers**.
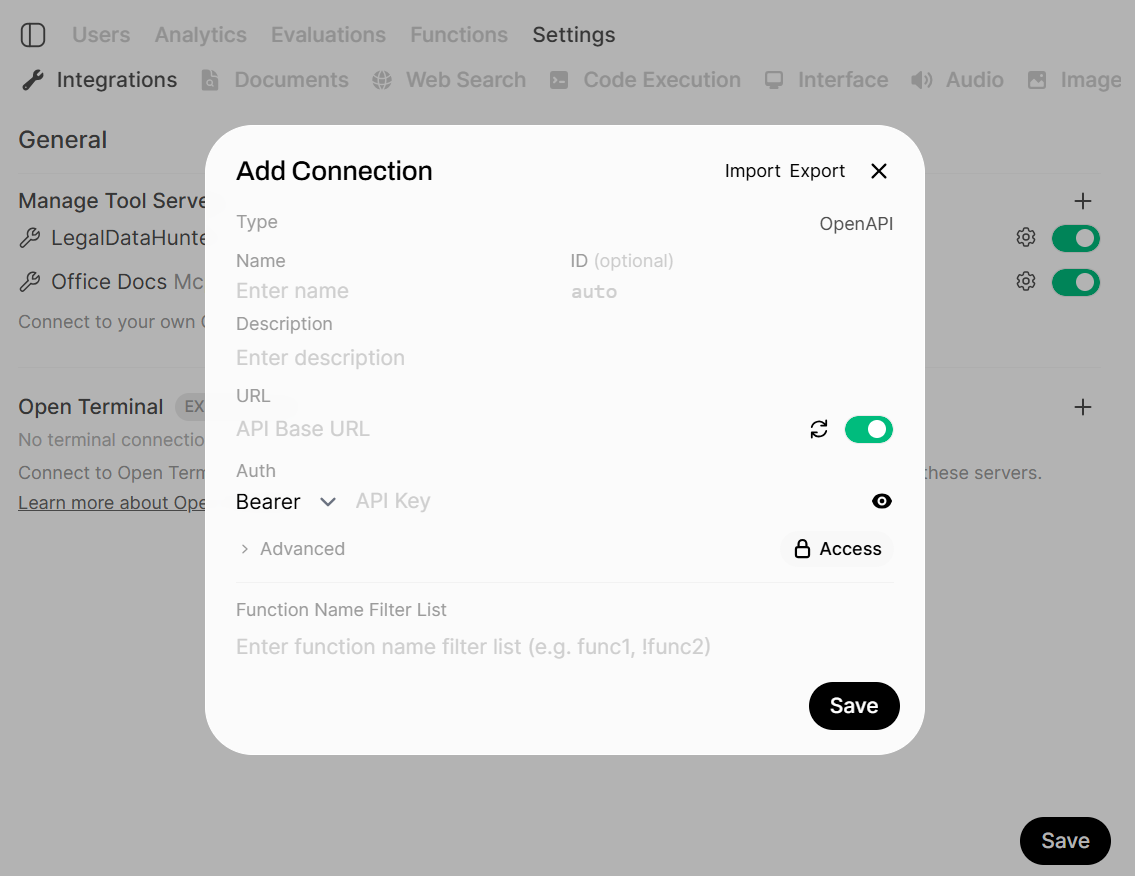
 4. Click on the **+** icon, the **Add Connection** screen will pop up.
 5. Press the **OpenAPI** button at the right upper corner, your screen will look like this.
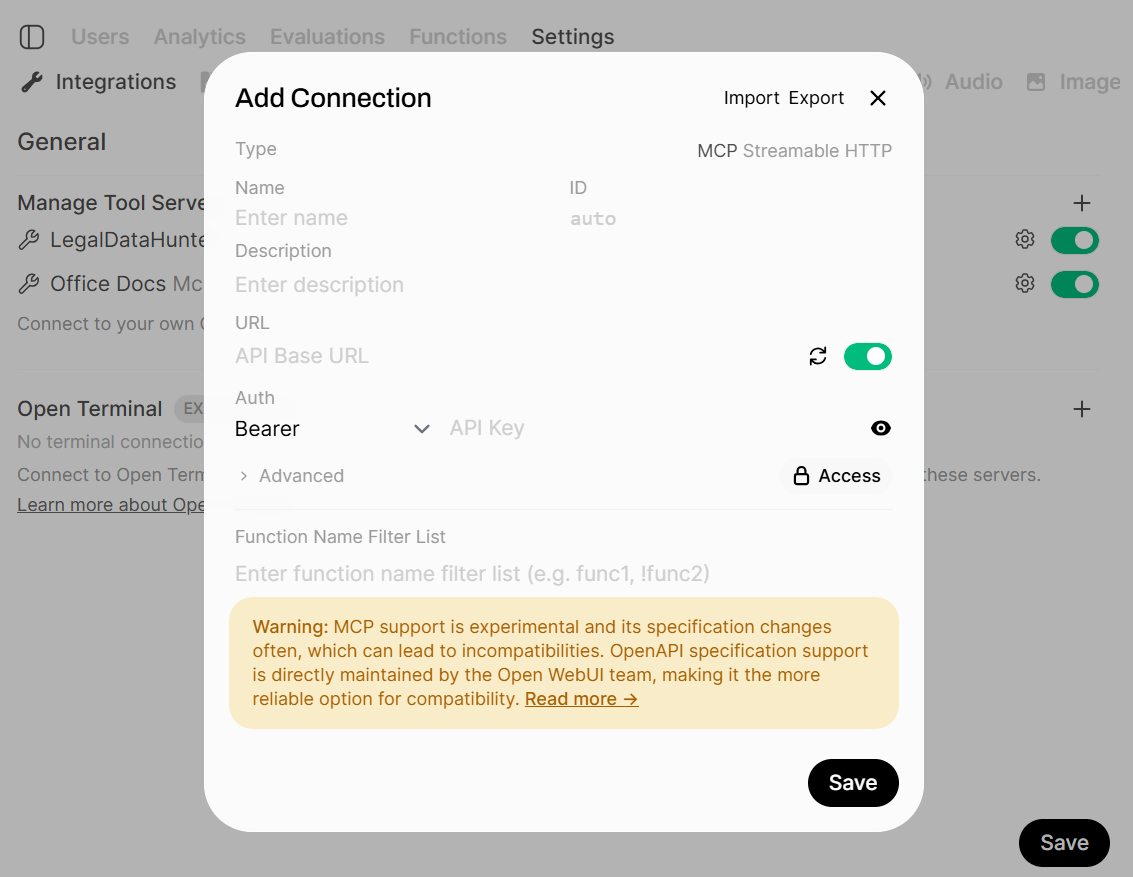 6. Now you are ready to set up your MCP server.
#### Step 2: Add an MCP server
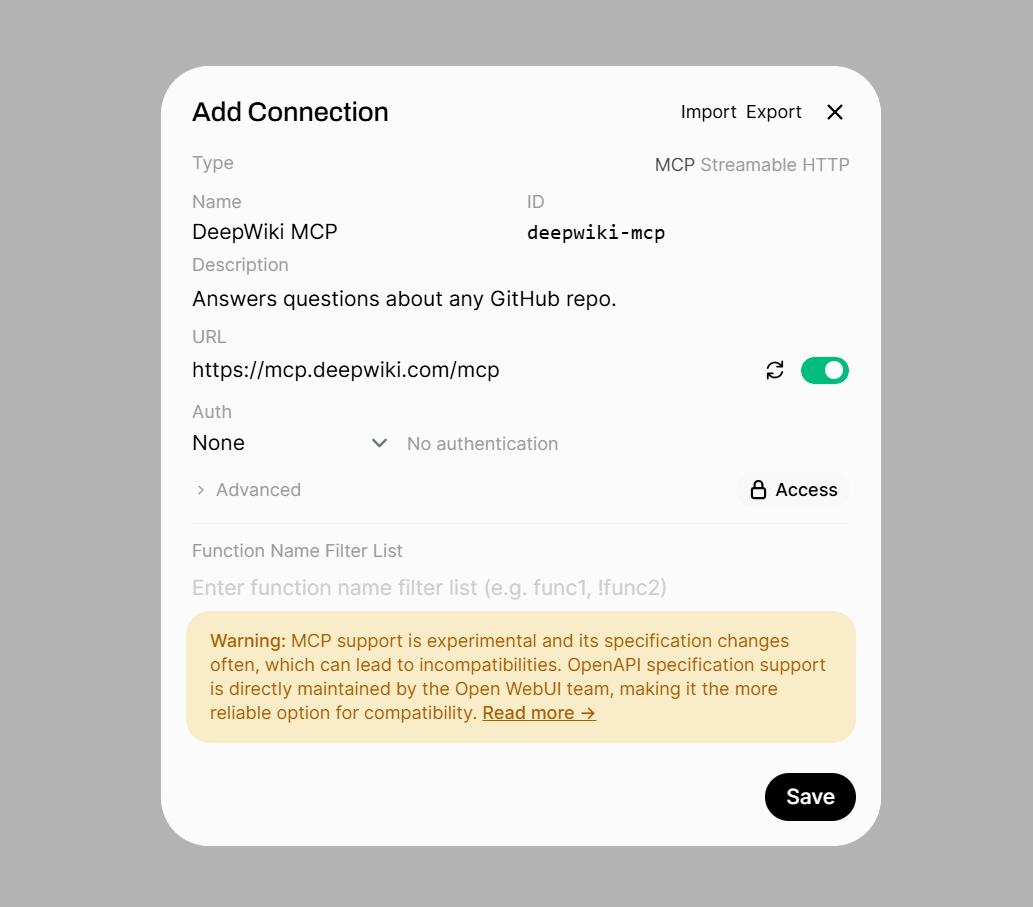
1. Configure your MCP in the pop up screen. To give you an idea, there is an example MCP (DeepWiki) in the image below.
6. Now you are ready to set up your MCP server.
#### Step 2: Add an MCP server
1. Configure your MCP in the pop up screen. To give you an idea, there is an example MCP (DeepWiki) in the image below.
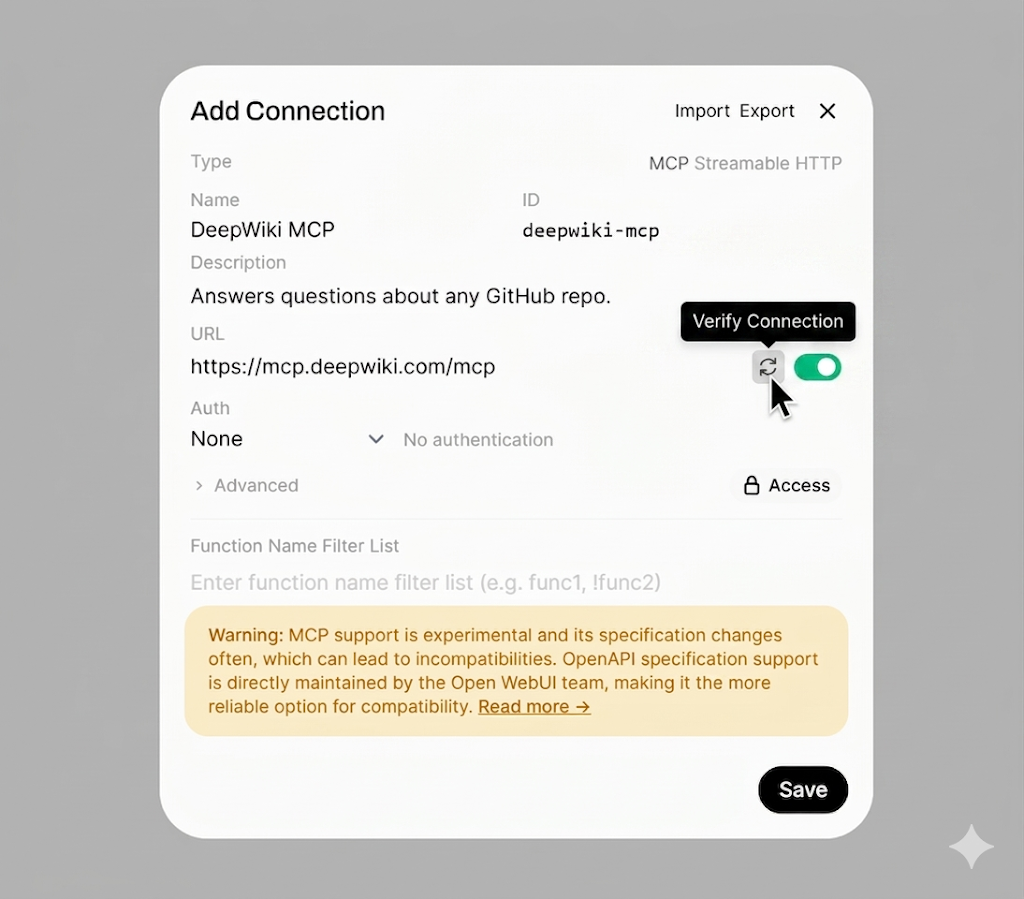
 2. Click on the **Verify Connection** button, if your connection is working you will see the message `Connection successful` in the right top corner of your screen.
 3. Click on **Save**, in the right top corner the message `Connection saved successfully` will appear.
4. Go to your chat environment and click on **Integrations**.
3. Click on **Save**, in the right top corner the message `Connection saved successfully` will appear.
4. Go to your chat environment and click on **Integrations**.
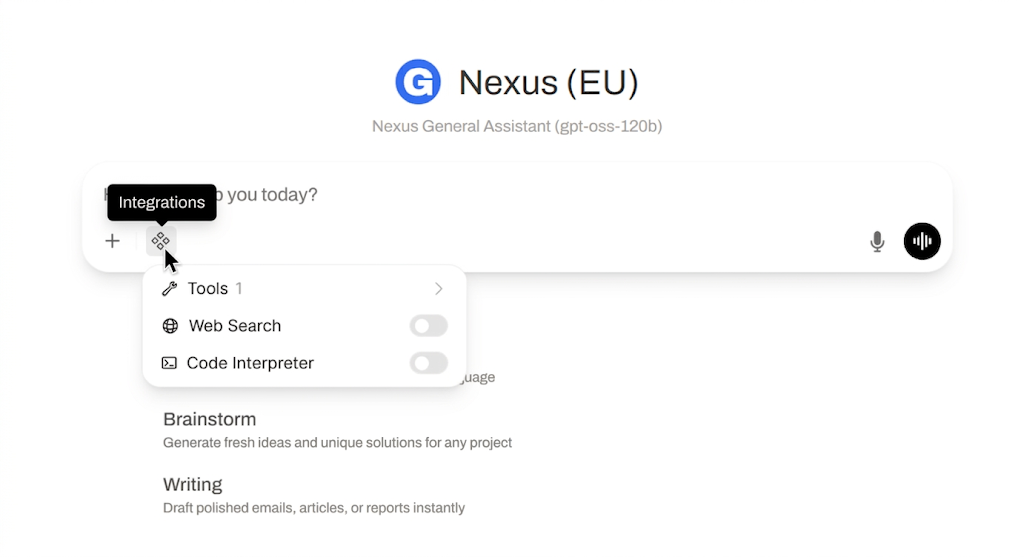 5. Select **Tools** and enable the MCP server.
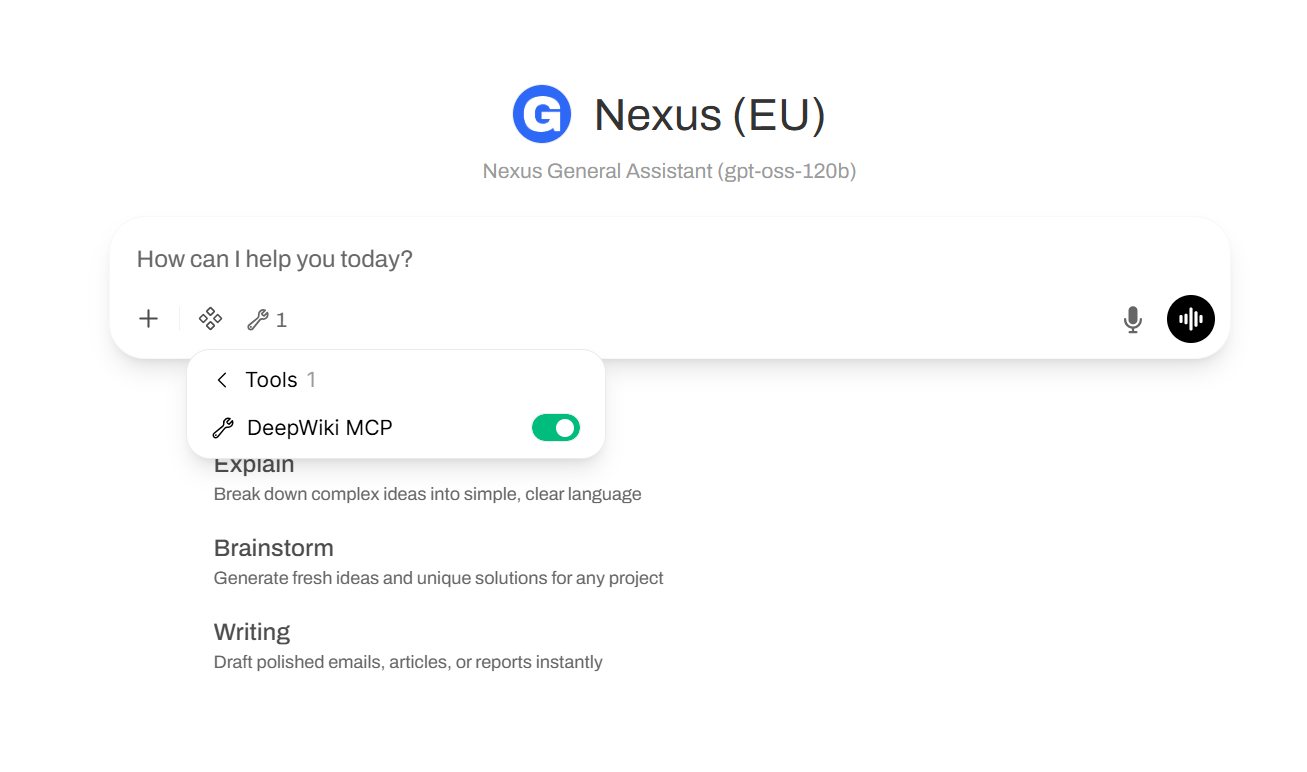 6. You are now able to use your MCP server in the chat environment.
**Note:** For every model you use, you need to independently enable the MCP server. You can simply do this from your chat environment, as proposed from the **fourth** step in **Step 2: Connect an MCP Server**.
***
*Need help? Contact the GLBNXT support team or ask a GLBNXT agent to walk you through the setup.*
---
# Agent Instructions
This documentation is published with GitBook. GitBook is the documentation platform designed so that both humans and AI agents can read, navigate, and reason over technical content effectively. Learn more at gitbook.com.
## Querying This Documentation
If you need additional information that is not directly available in this page, you can query the documentation dynamically by asking a question.
Perform an HTTP GET request on the current page URL with the `ask` query parameter, and the optional `goal` query parameter:
```
GET https://docs.glbnxt.com/tutorials/guides/openwebui/mcp-openwebui.md?ask=&goal=
```
`ask` is the immediate question: it should be specific, self-contained, and written in natural language.
`goal` is optional and describes the broader end goal you are ultimately trying to accomplish on behalf of the user. GitBook uses it to tailor the answer towards what is most useful for that goal.
The response will contain a direct answer to the question and relevant excerpts and sources from the documentation.
Use this mechanism when the answer is not explicitly present in the current page, you need clarification or additional context, or you want to retrieve related documentation sections.
6. You are now able to use your MCP server in the chat environment.
**Note:** For every model you use, you need to independently enable the MCP server. You can simply do this from your chat environment, as proposed from the **fourth** step in **Step 2: Connect an MCP Server**.
***
*Need help? Contact the GLBNXT support team or ask a GLBNXT agent to walk you through the setup.*
---
# Agent Instructions
This documentation is published with GitBook. GitBook is the documentation platform designed so that both humans and AI agents can read, navigate, and reason over technical content effectively. Learn more at gitbook.com.
## Querying This Documentation
If you need additional information that is not directly available in this page, you can query the documentation dynamically by asking a question.
Perform an HTTP GET request on the current page URL with the `ask` query parameter, and the optional `goal` query parameter:
```
GET https://docs.glbnxt.com/tutorials/guides/openwebui/mcp-openwebui.md?ask=&goal=
```
`ask` is the immediate question: it should be specific, self-contained, and written in natural language.
`goal` is optional and describes the broader end goal you are ultimately trying to accomplish on behalf of the user. GitBook uses it to tailor the answer towards what is most useful for that goal.
The response will contain a direct answer to the question and relevant excerpts and sources from the documentation.
Use this mechanism when the answer is not explicitly present in the current page, you need clarification or additional context, or you want to retrieve related documentation sections.